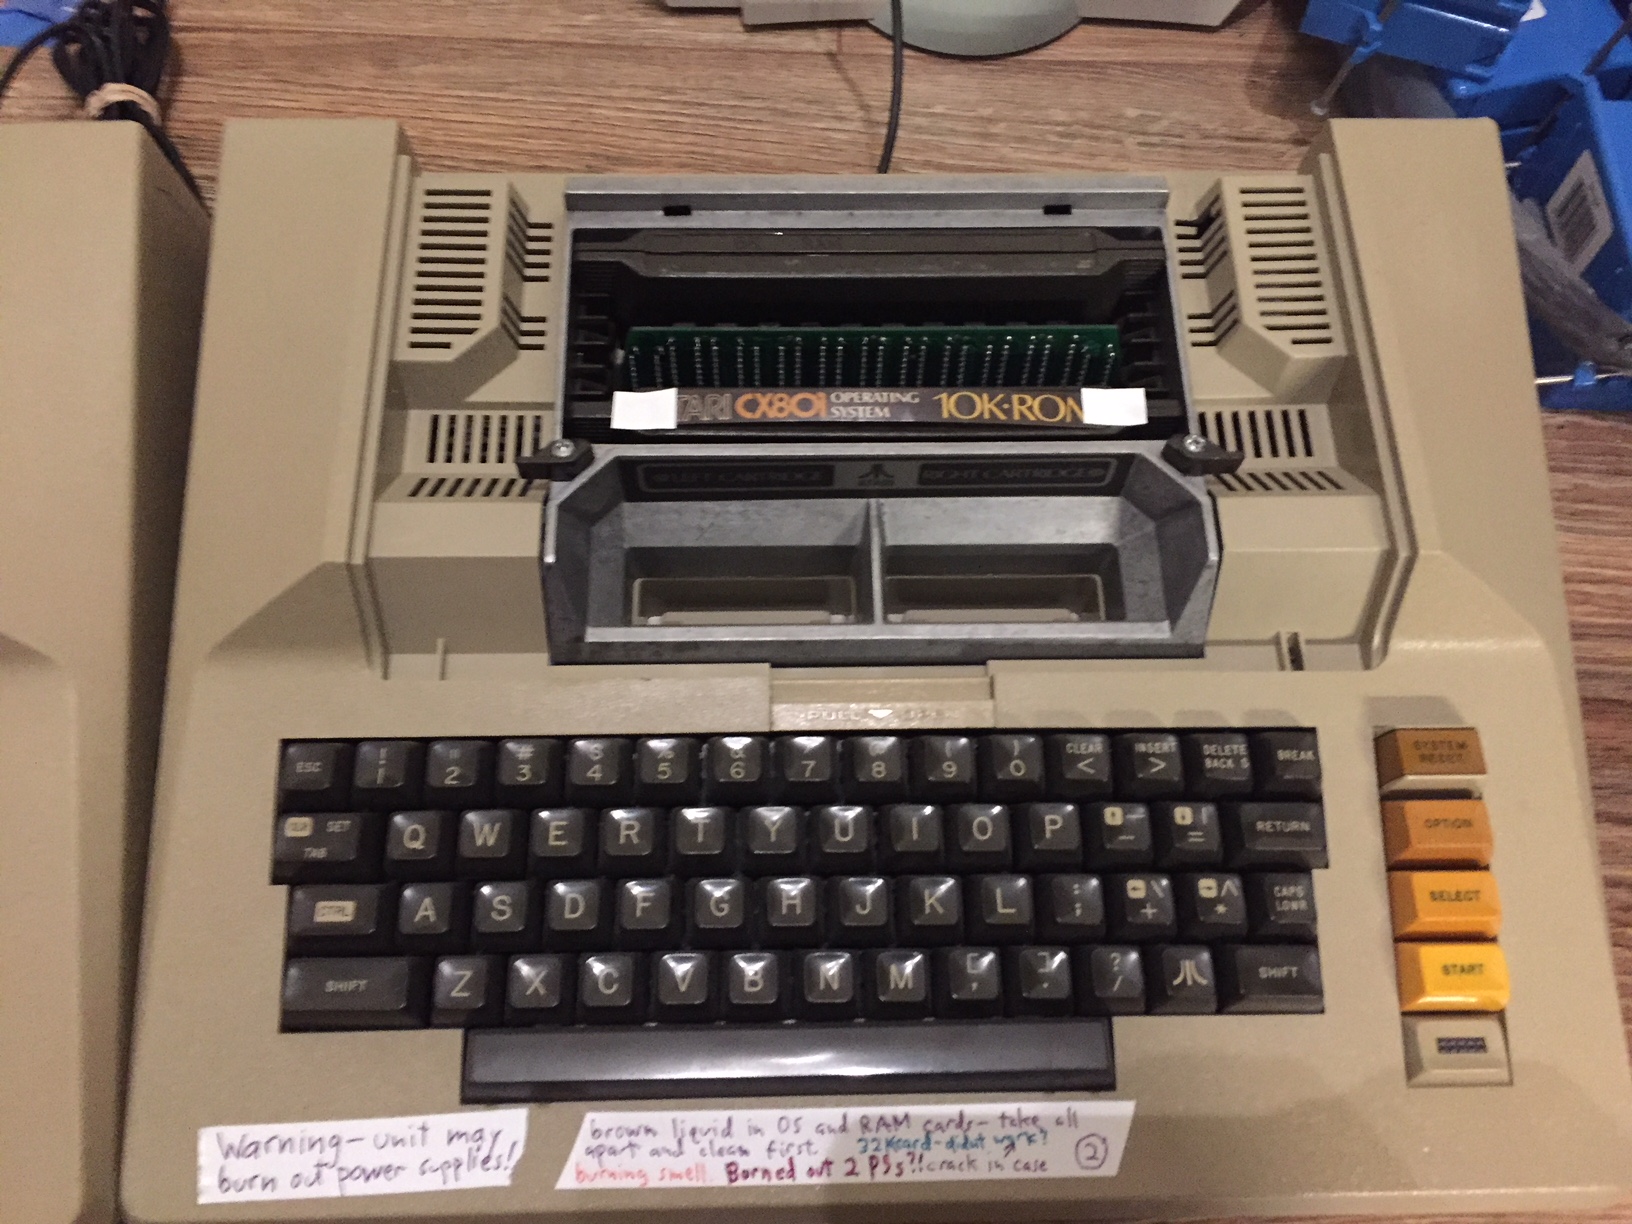
In December 2017, we received a generous donation of artifacts from David Whiteis in Maryland and among the items was an Atari 800. Several other interesting items from this same lot will be added soon, so please check back often. This poor 800 had a rough life as evidenced from the numerous warning stickers on the case including “may burn out power supplies”, “burning smell”, and my favorite, “brown liquid… take apart and clean first”. It was also missing the top cover. It could have easily headed for the scrap heap, though, so I am grateful to have been able to rescue it.
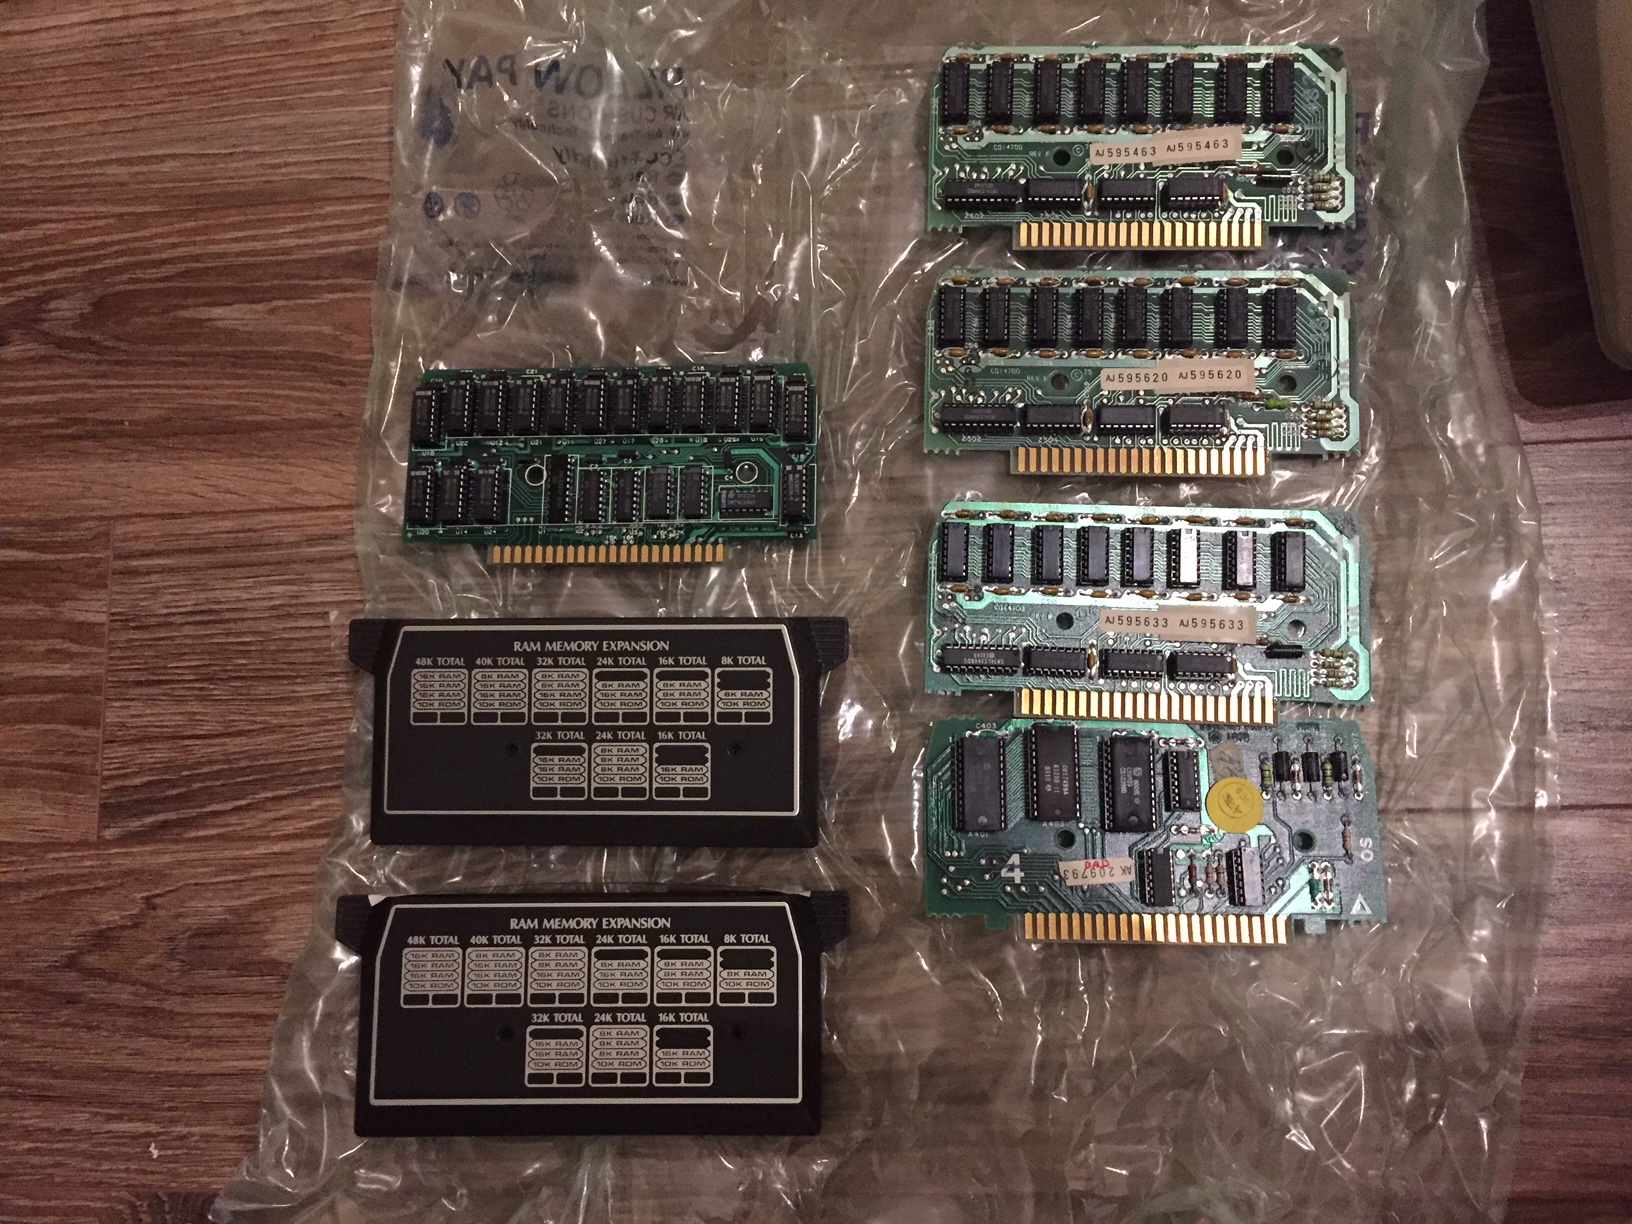
We were able to locate another badly damaged 800 which was also likely headed to a similar fate, but it had the top cover we needed along with a full set of RAM and ROM boards. You can see them both in the photos below:
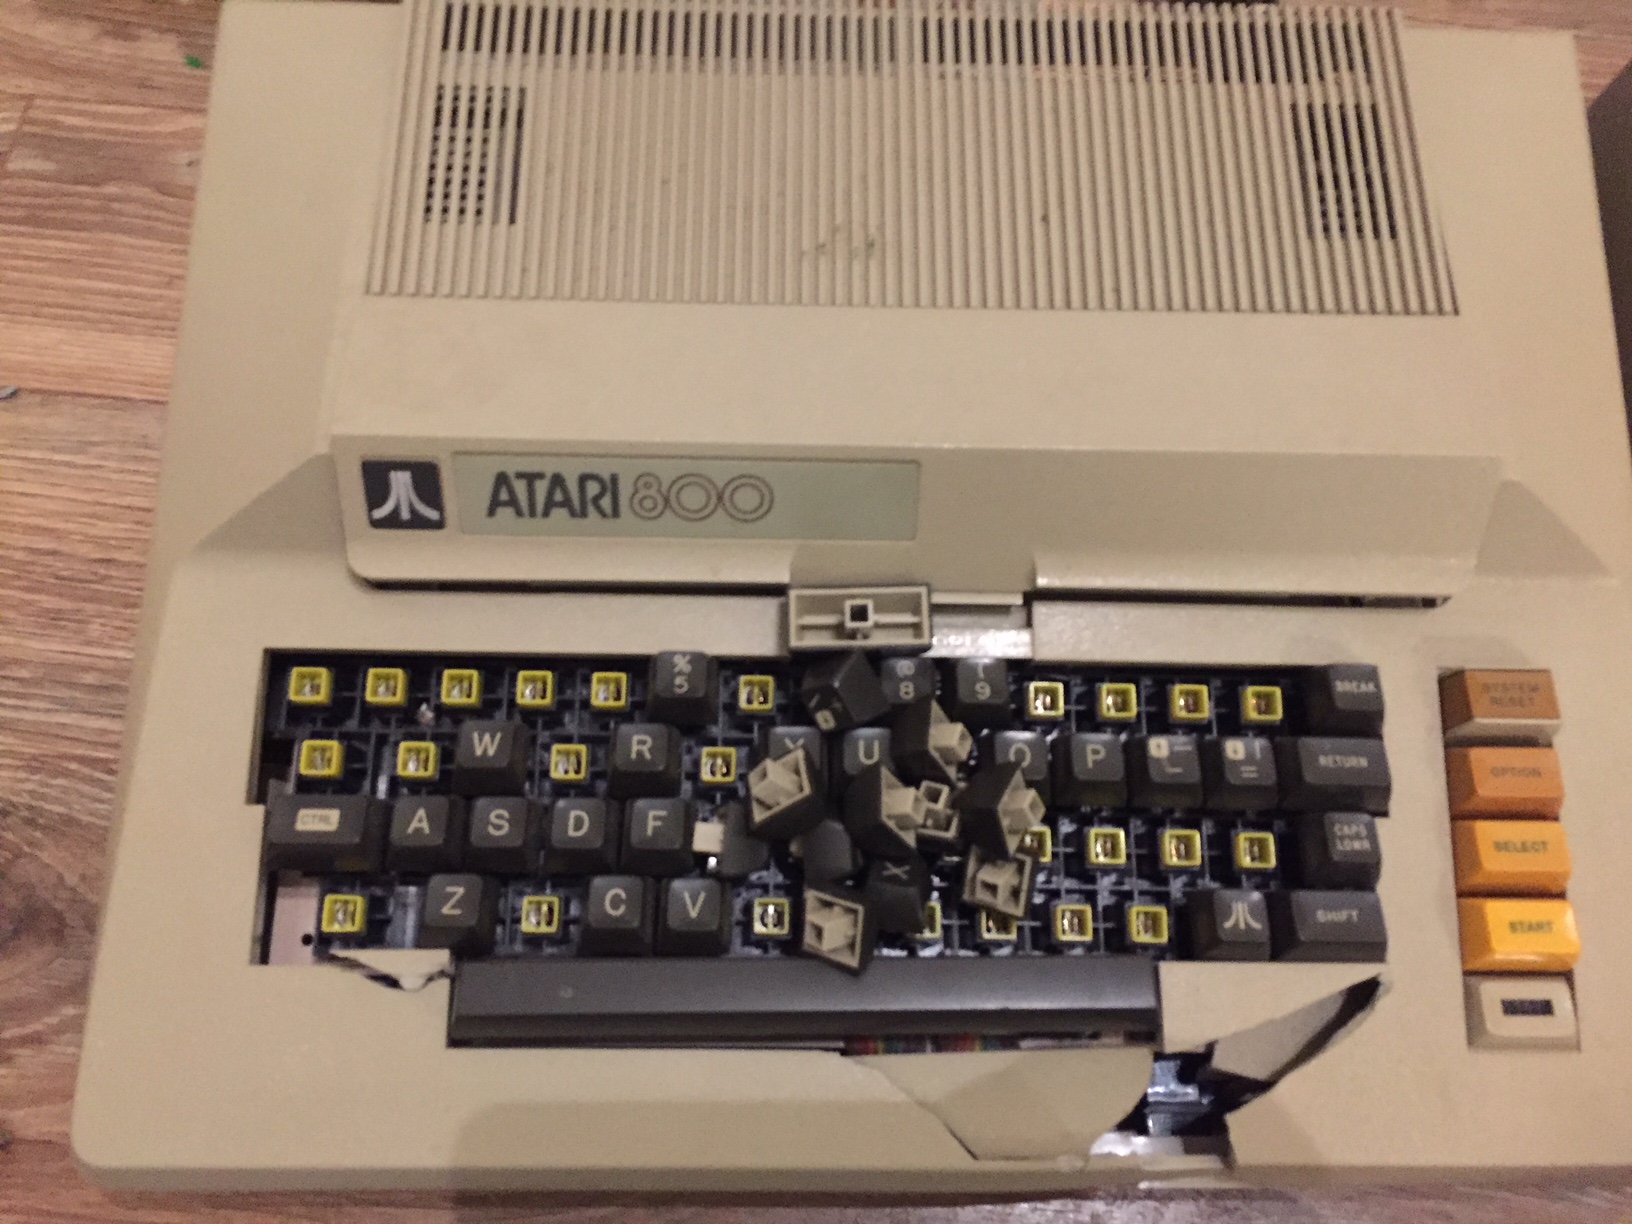
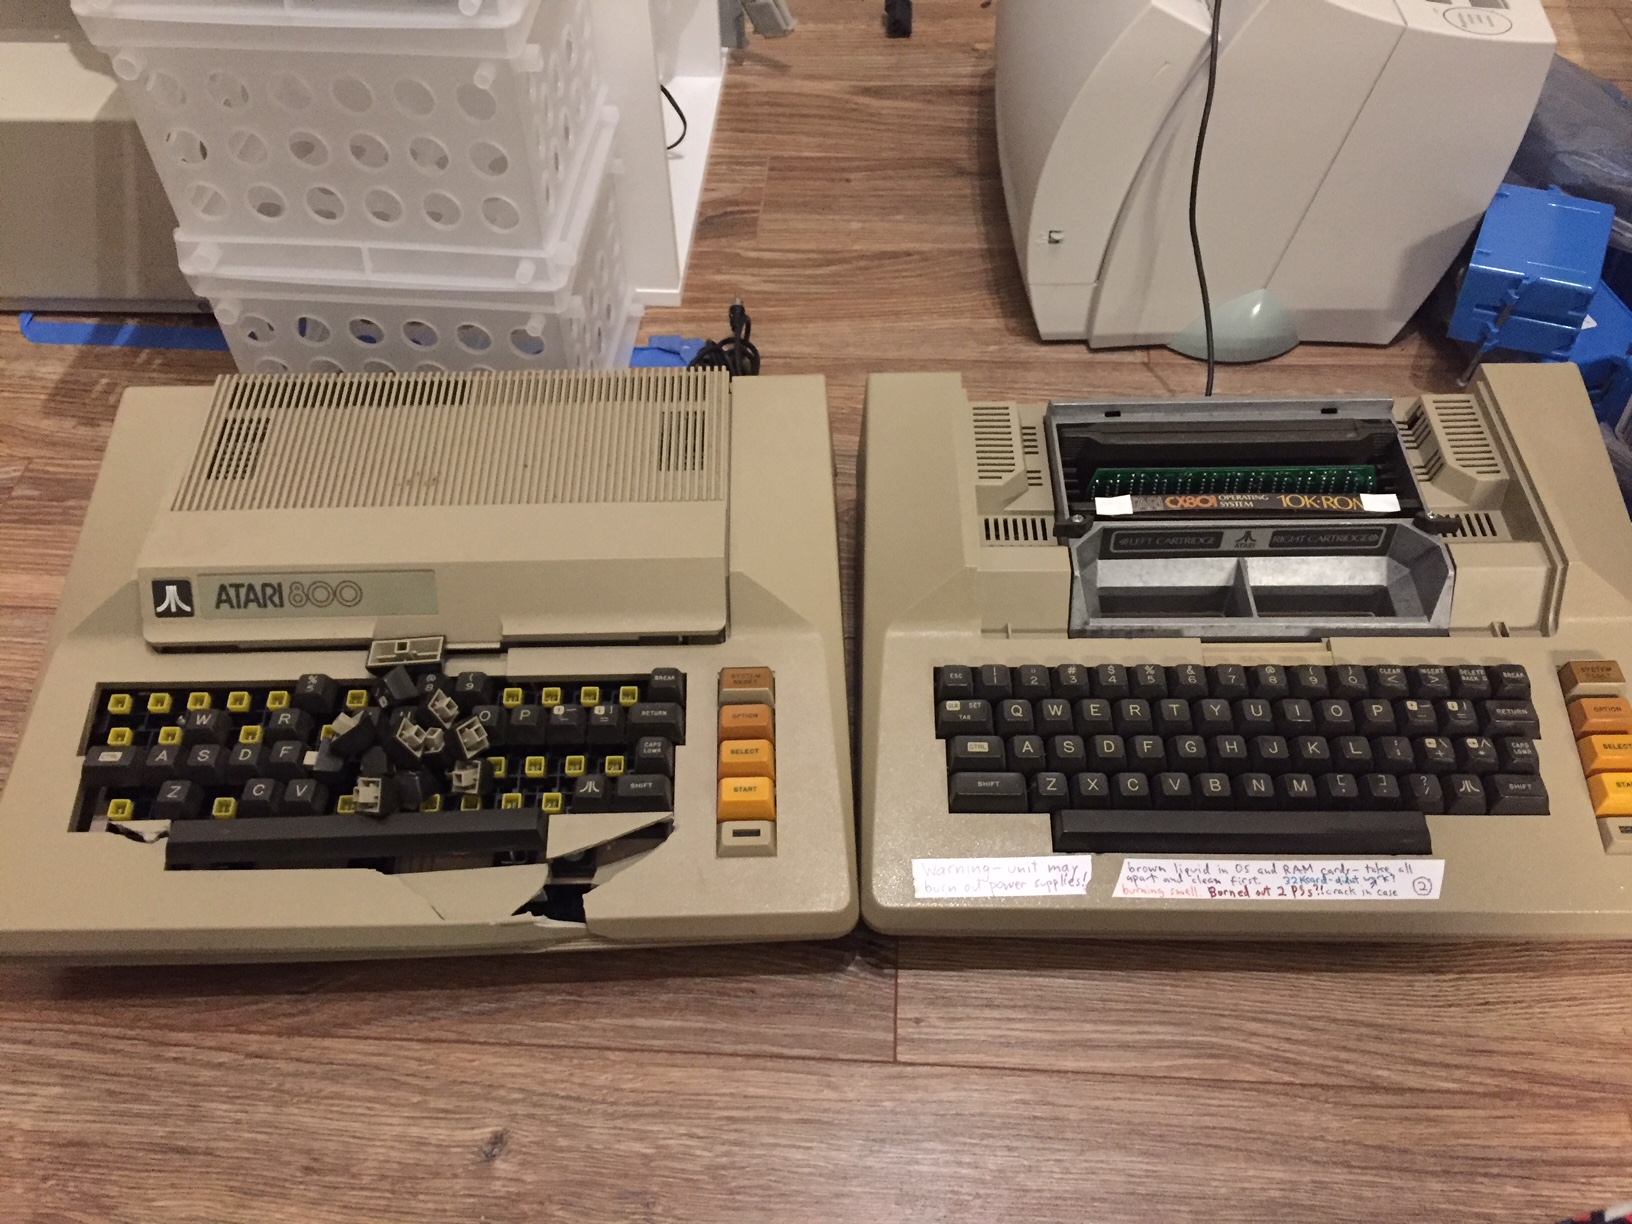
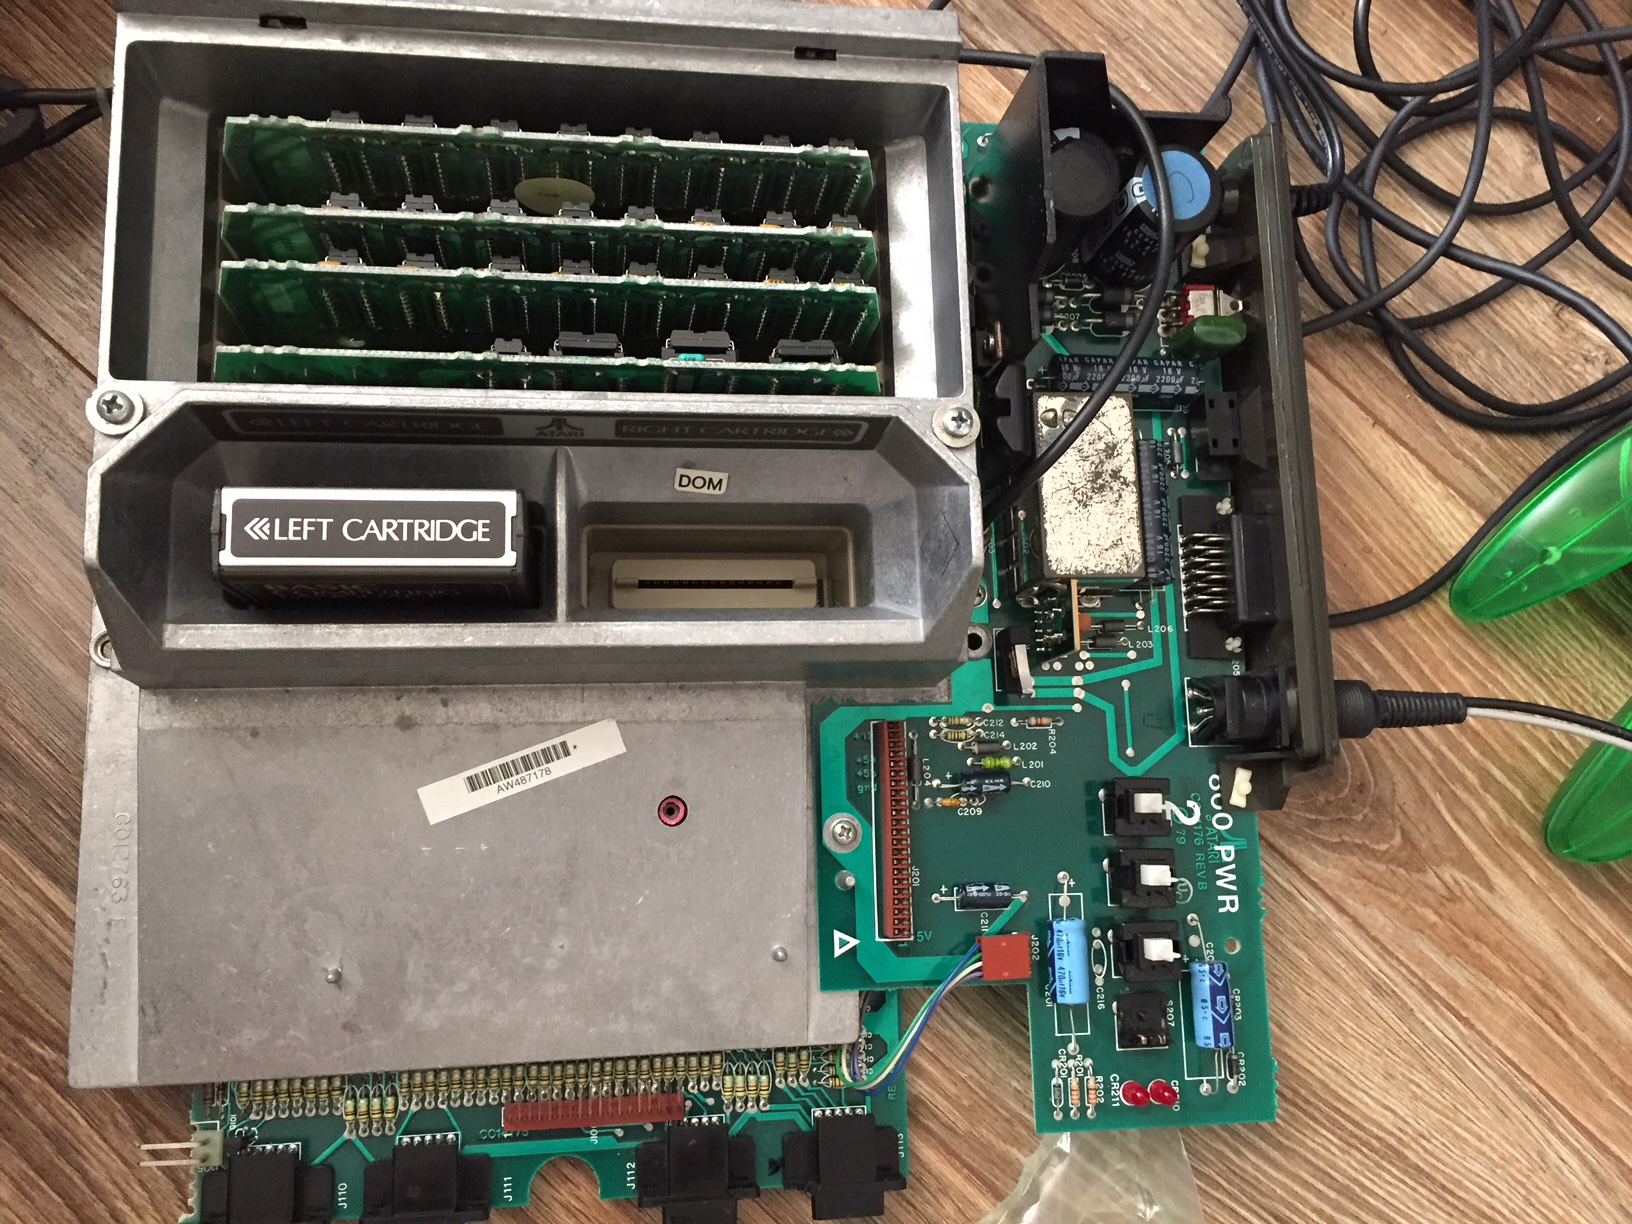
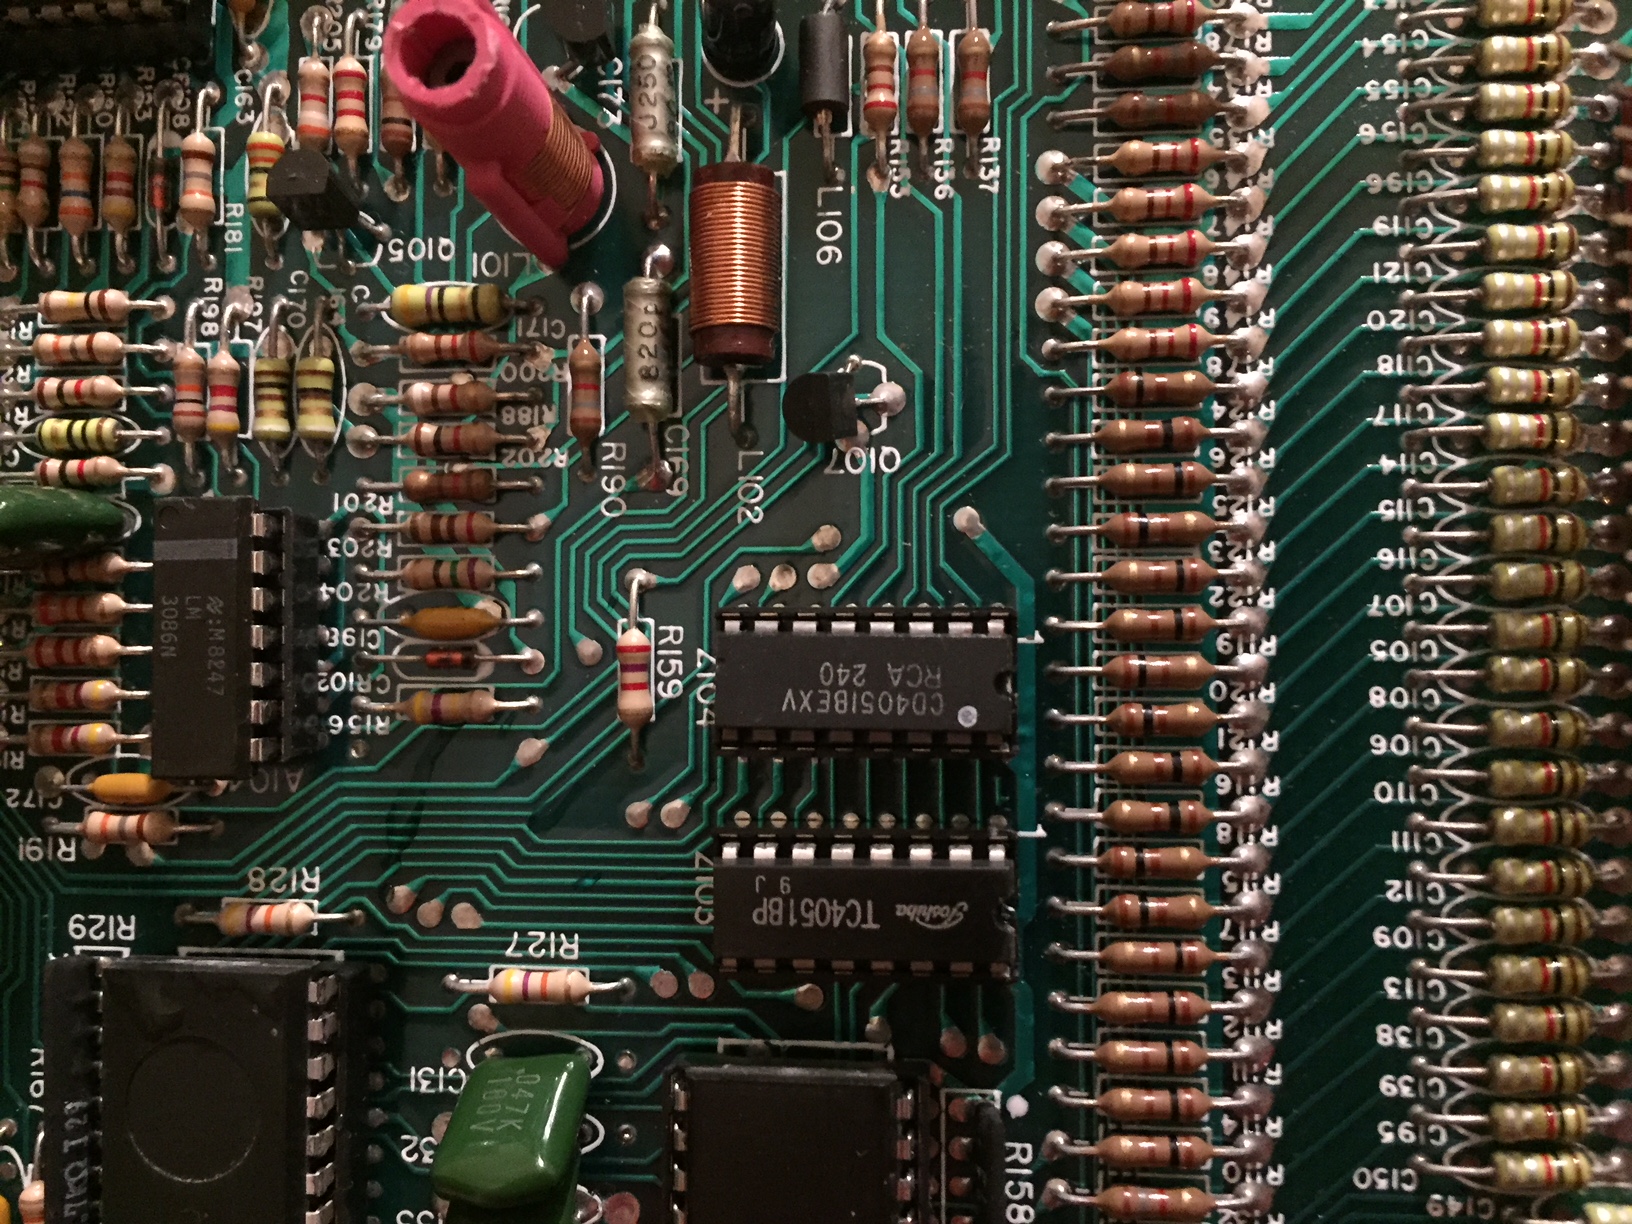
One of my favorite types of projects are like this one, taking two (or more) systems that individually would have been considered a lost cause and combining them into a complete working system in good condition. While always up for a challenge, I really had no idea whether we had enough good parts between the two for success or not. Let’s get started with a complete teardown of both and seeing what we have to work with. I quickly ruled out the damaged case parts and keyboard. After separating the power and system boards, I tested both power boards by themselves. The one from the machine with the “burning smell” did indeed smell when powered on, so I ruled that one out as well but the other power board tested out just fine. Examining the system board from that same machine, I did find an oily tan/brown substance in all of the card slots. You can see it here on the CPU board if you look close to the card edge socket:
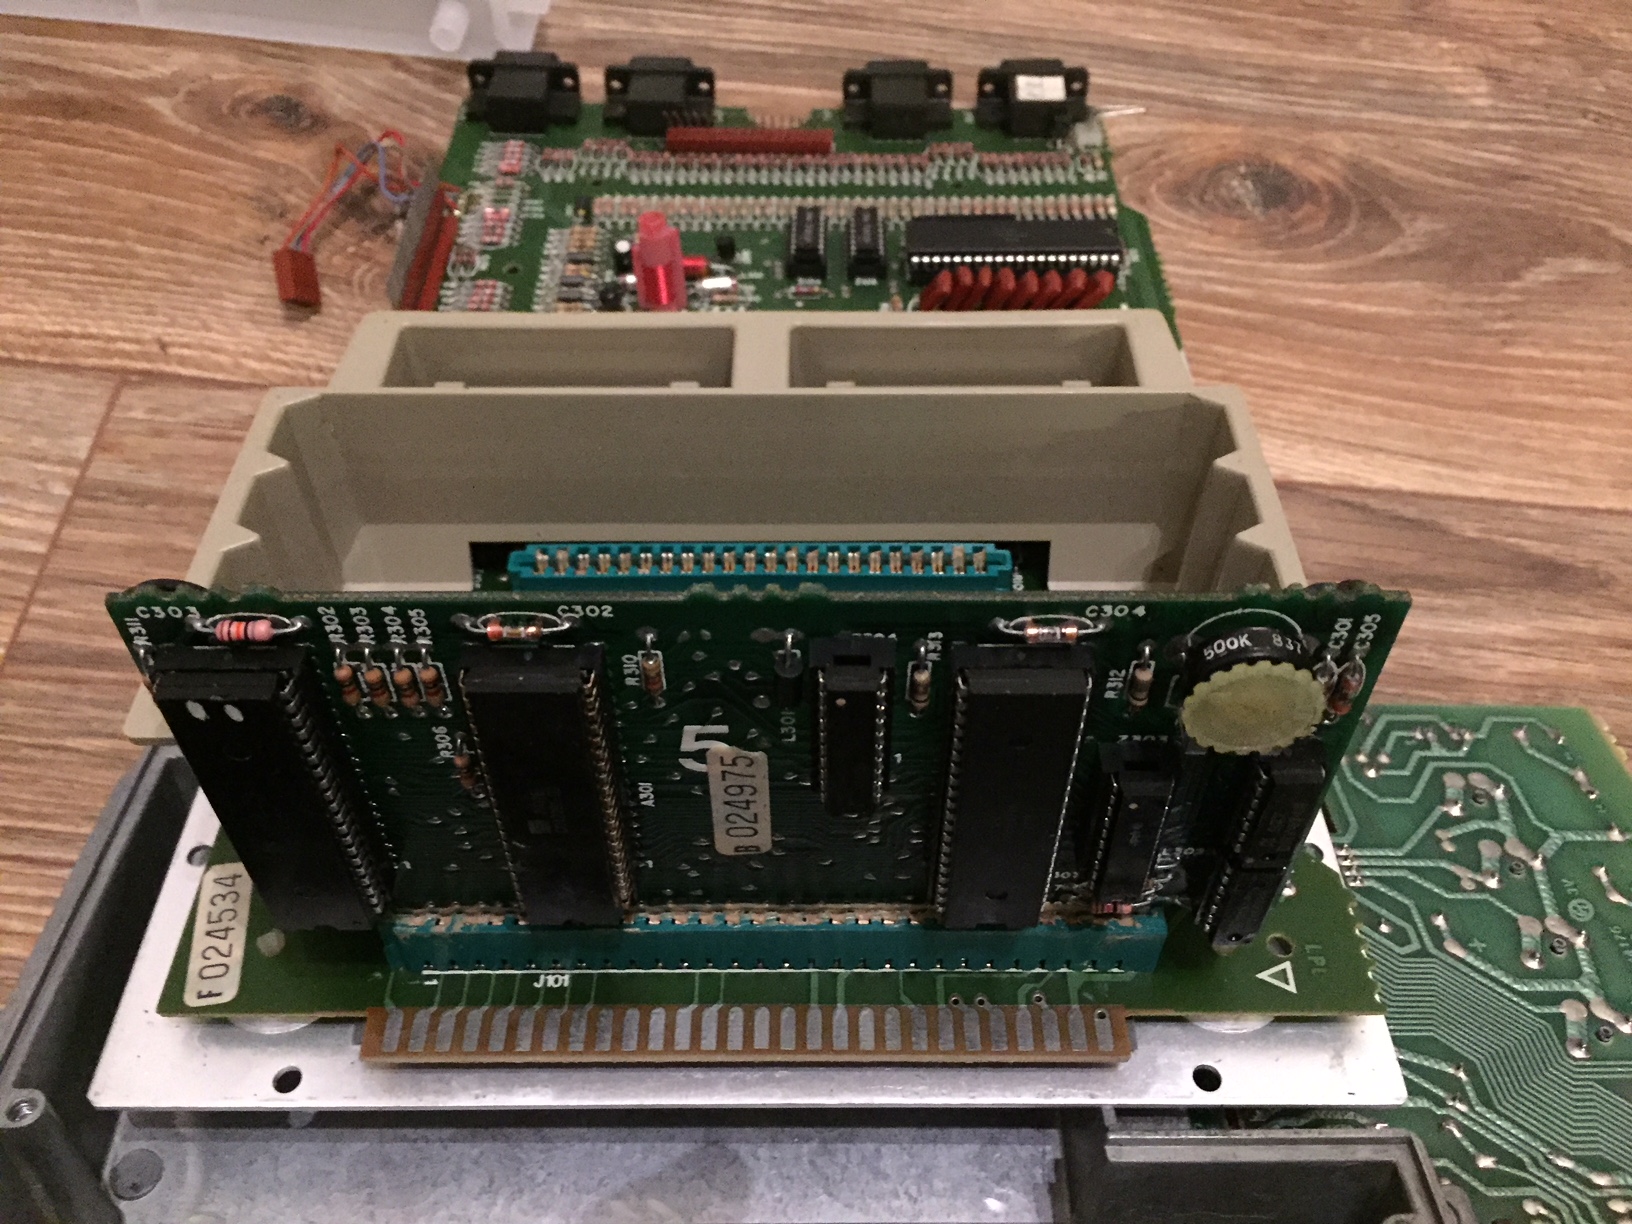
Like the power board, the damaged system also had a system board that looked good so I decided to use that for initial testing. I also laid out all of the RAM and ROM boards, the boards on the left were from the machine with the brown oily substance, the ones on the right from the damaged machine. I noticed that the ROM/OS board from the damaged machine had “bad” written on a small label.
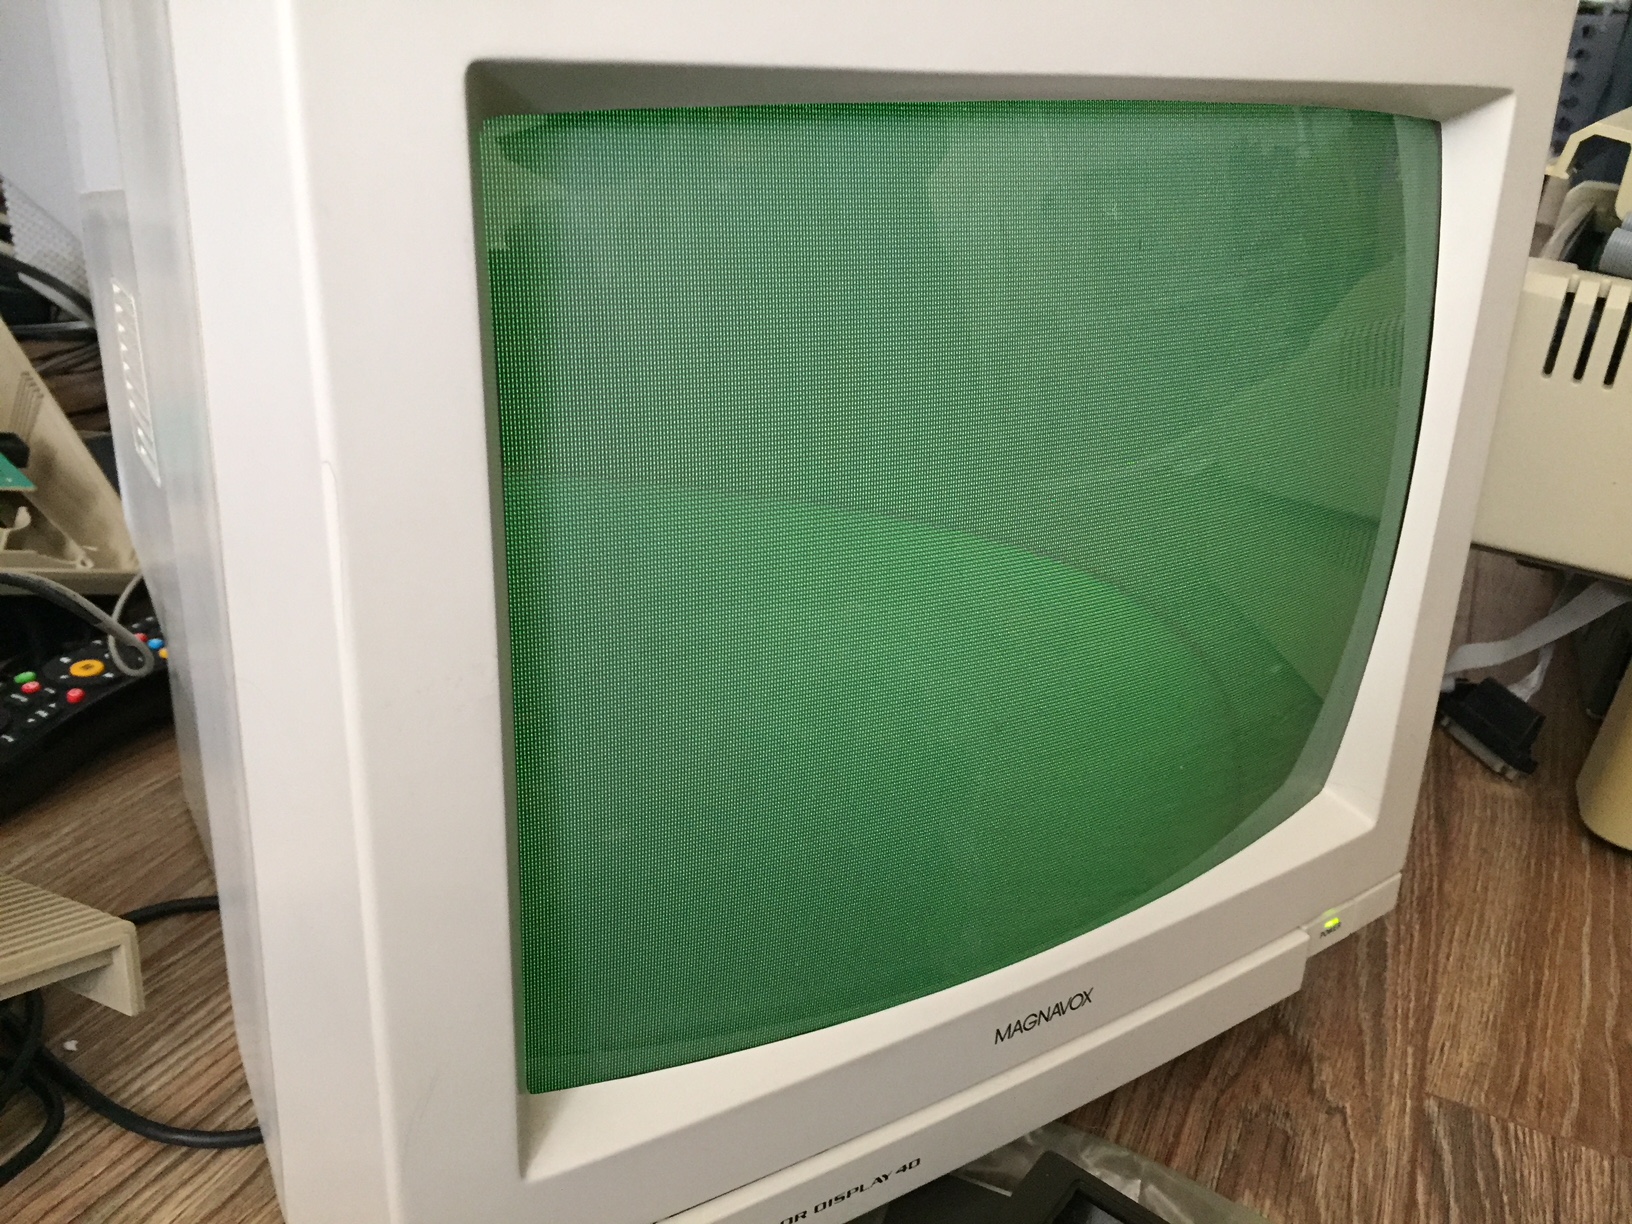
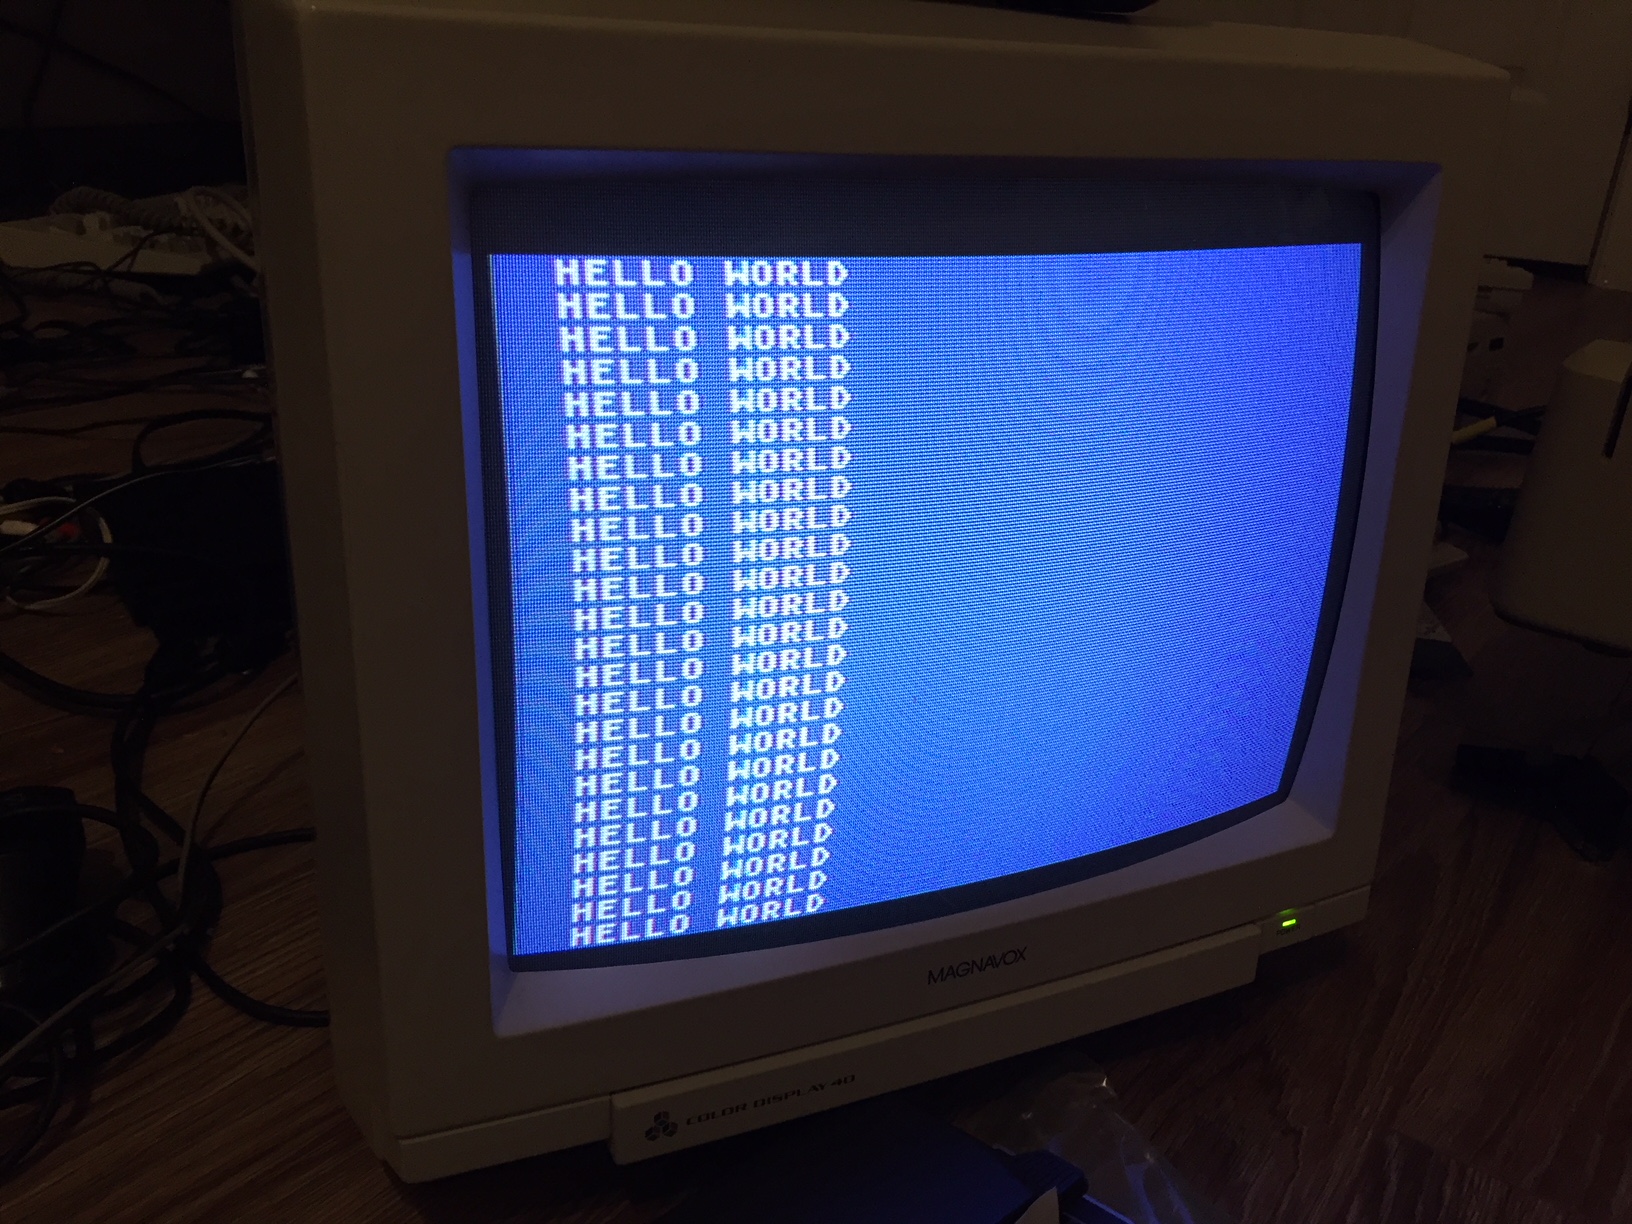
So, I assembled the power, motherboard, OS, and RAM boards from the damaged machine and decided to go ahead and apply power. Surprisingly, no magic smoke and a green screen appeared on the display!
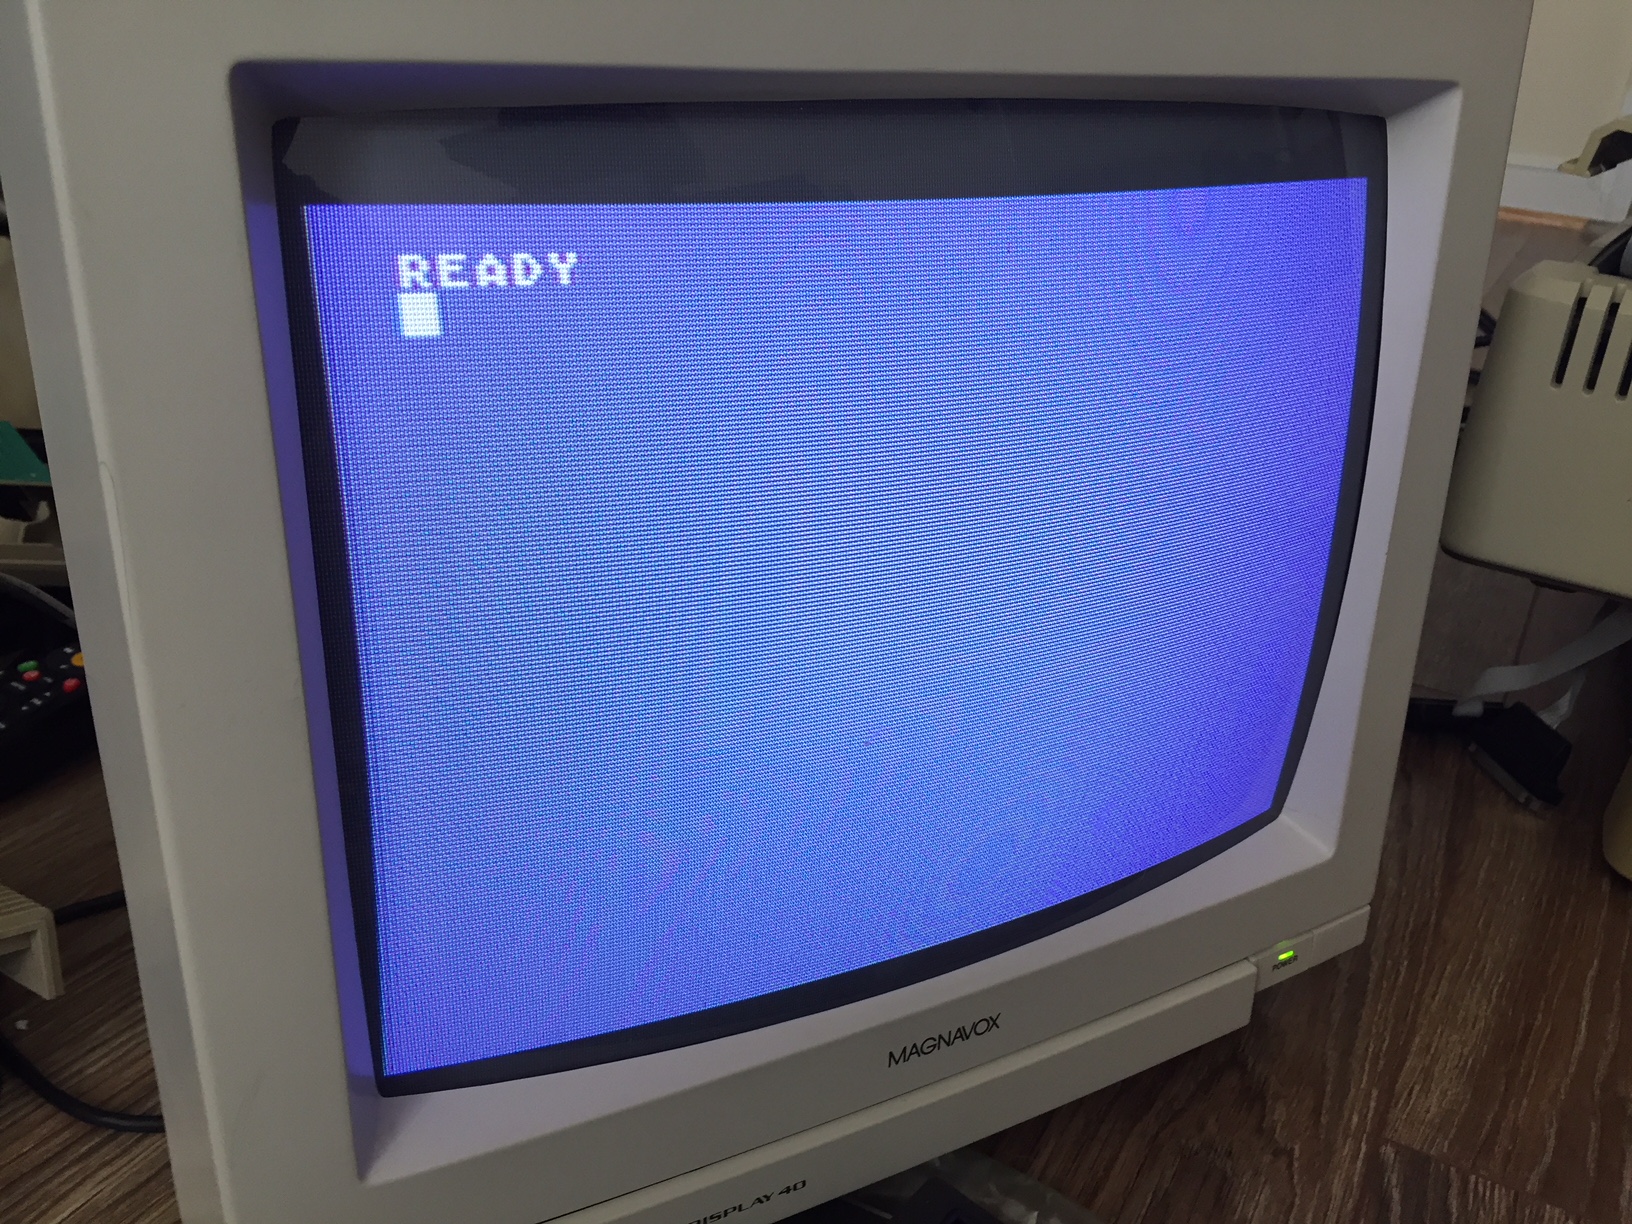
After a bit of research and remembering that the ROM card was labeled as “bad”, I decided to clean up the ROM card from the other machine and remove all traces of that oily residue. Once clean, I swapped out the ROM card and the machine boots right up!
I tried some chip swaps just to see if I could isolate the bad part(s) but quickly decided to leave it alone and move on to further testing and repairs. The next issue uncovered was that several columns of keys on the keyboard did not work, although other keys worked fine. Initially I tried cleaning and inspecting solder joints and such, but nothing seemed to change the behavior. I tested the keys with the multimeter and found that there was indeed continuity when the keys were pressed down. So, it seemed to be an issue with the decode circuitry rather than the keyboard itself. The first components after the keyboard connector were 2 encoder/decoder/mux IC’s (4051)that take the keyboard matrix inputs and feed them to the POKEY custom chip. Since they were socketed, and the dead keys seemed to have a pattern this seemed like a logical place to focus on. Initially I tested just re-seating the chips, but the problem persisted. I swapped one of the 4051’s with one from the other motherboard and it solved the problem. Another success!
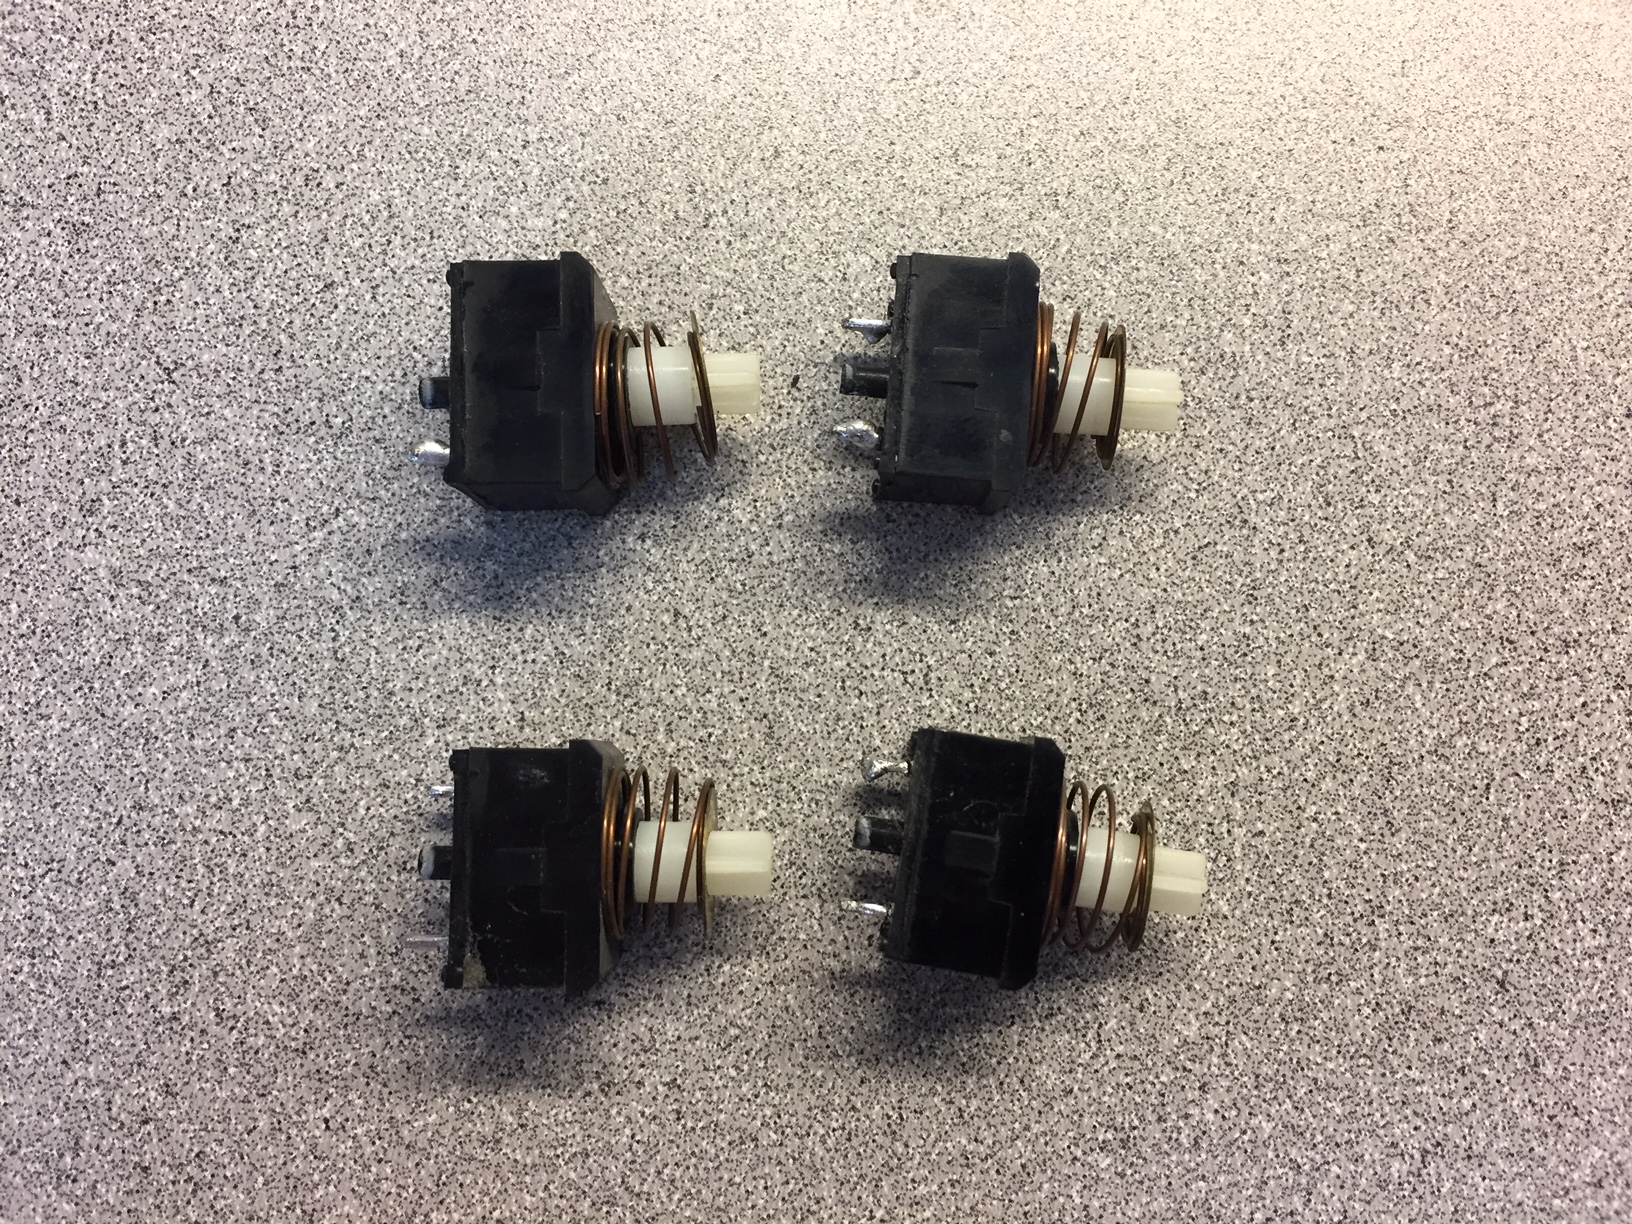
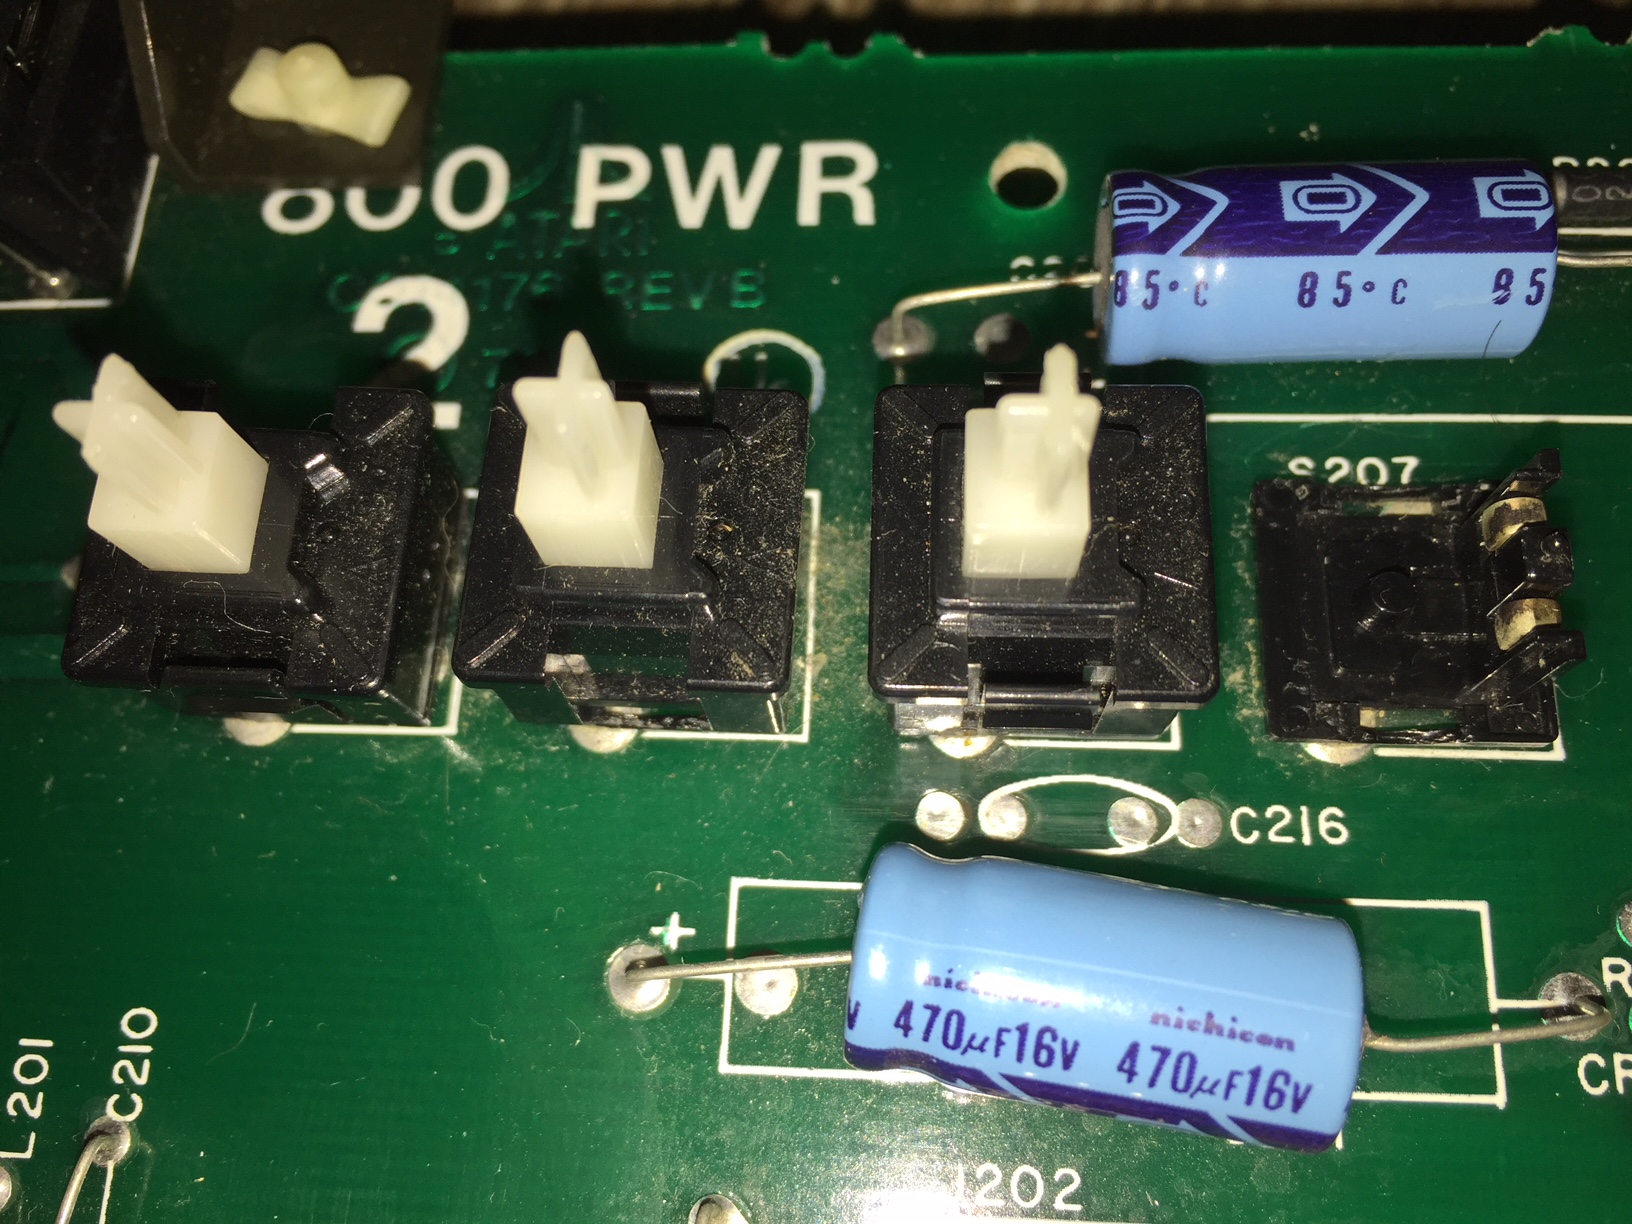
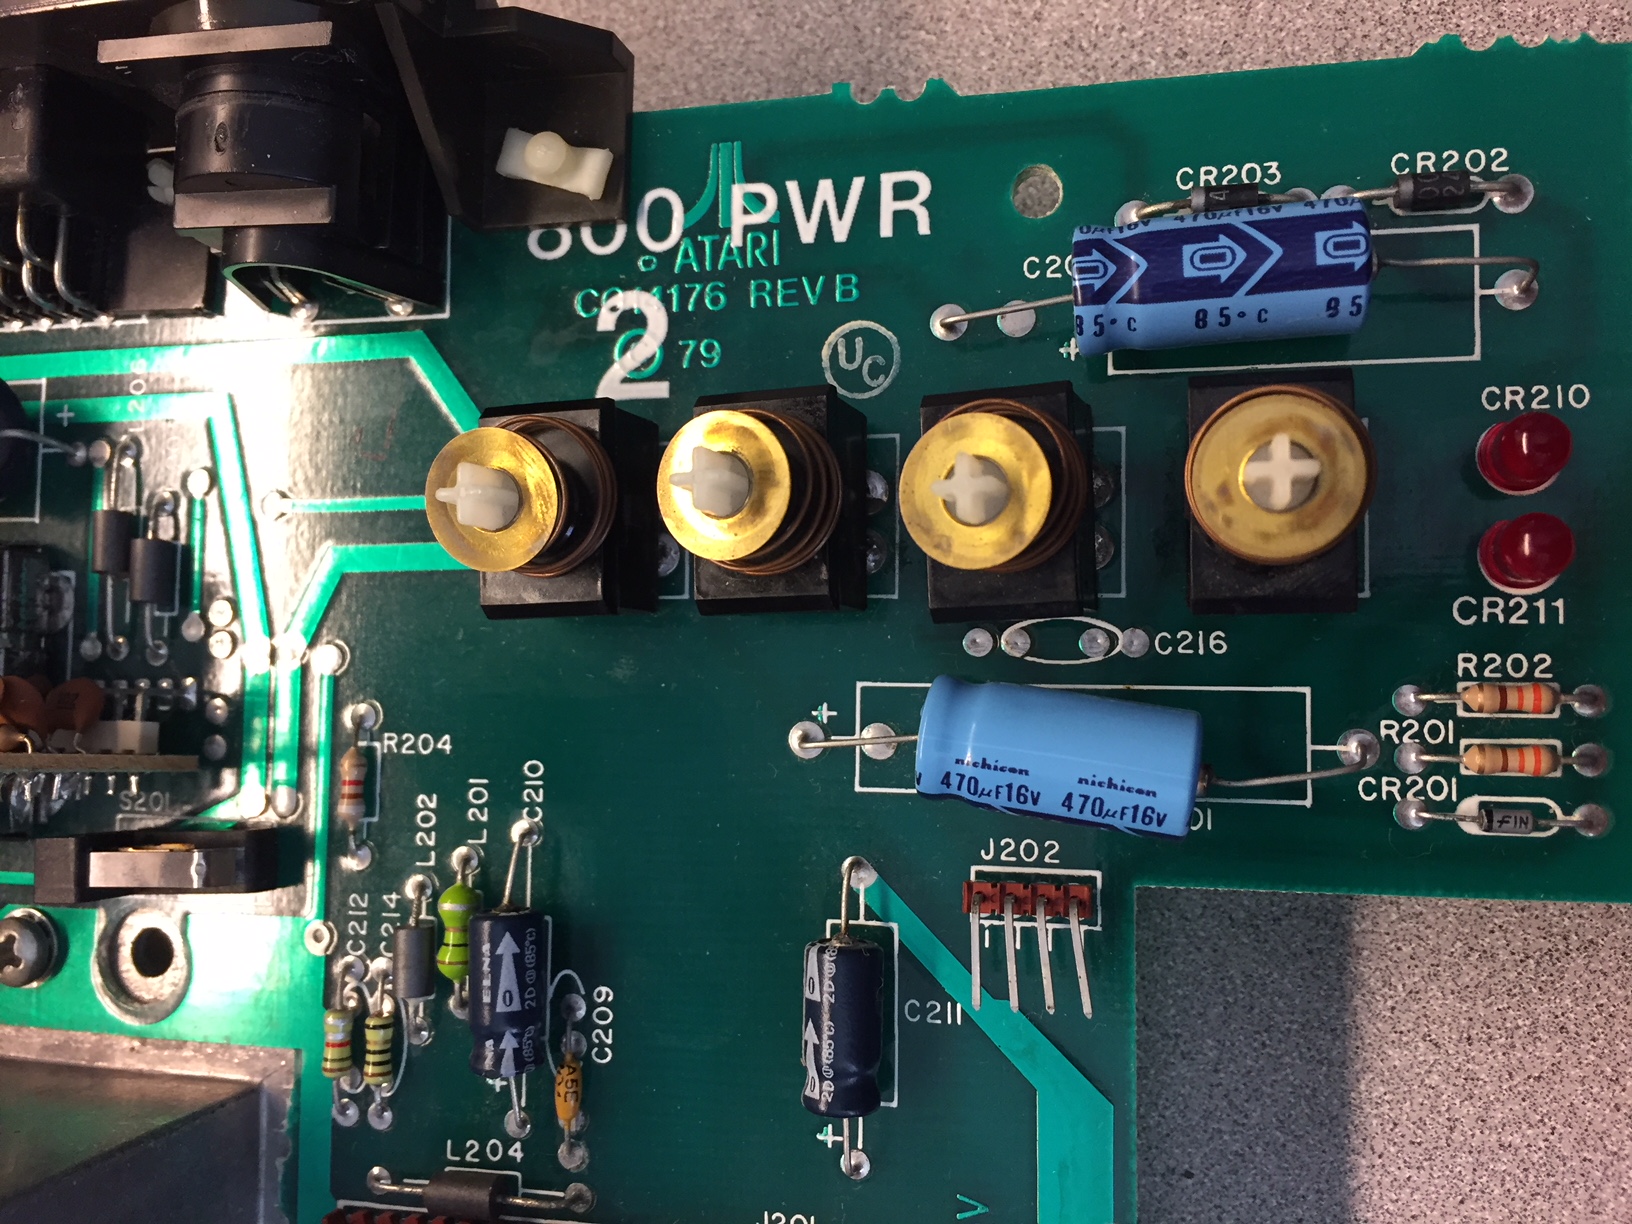
The last thing to deal with was the broken start/select/option/reset switches. For this, I simply removed the four switches from the “smoking” power board and swapped them for the broken ones. The first photo shows the good switches after removal, second is the good power board with the broken switches, and the third shows the new switches in place.
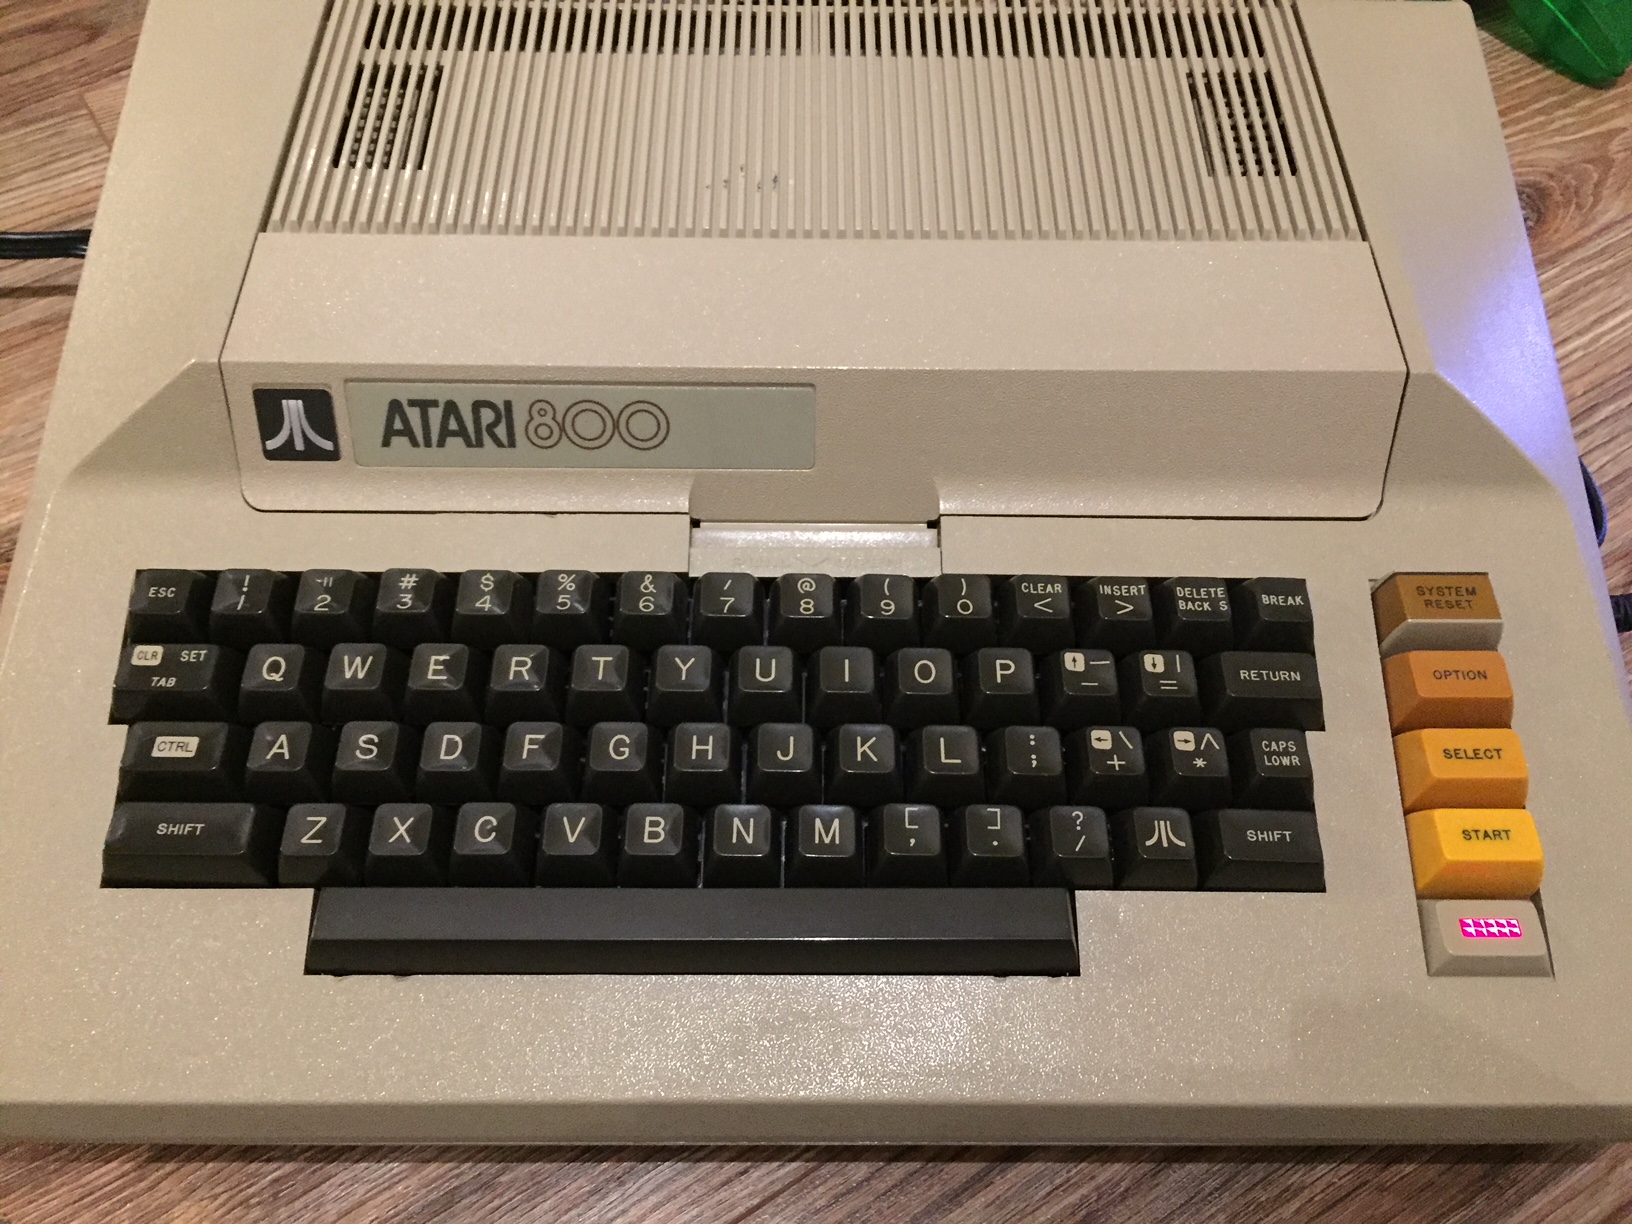
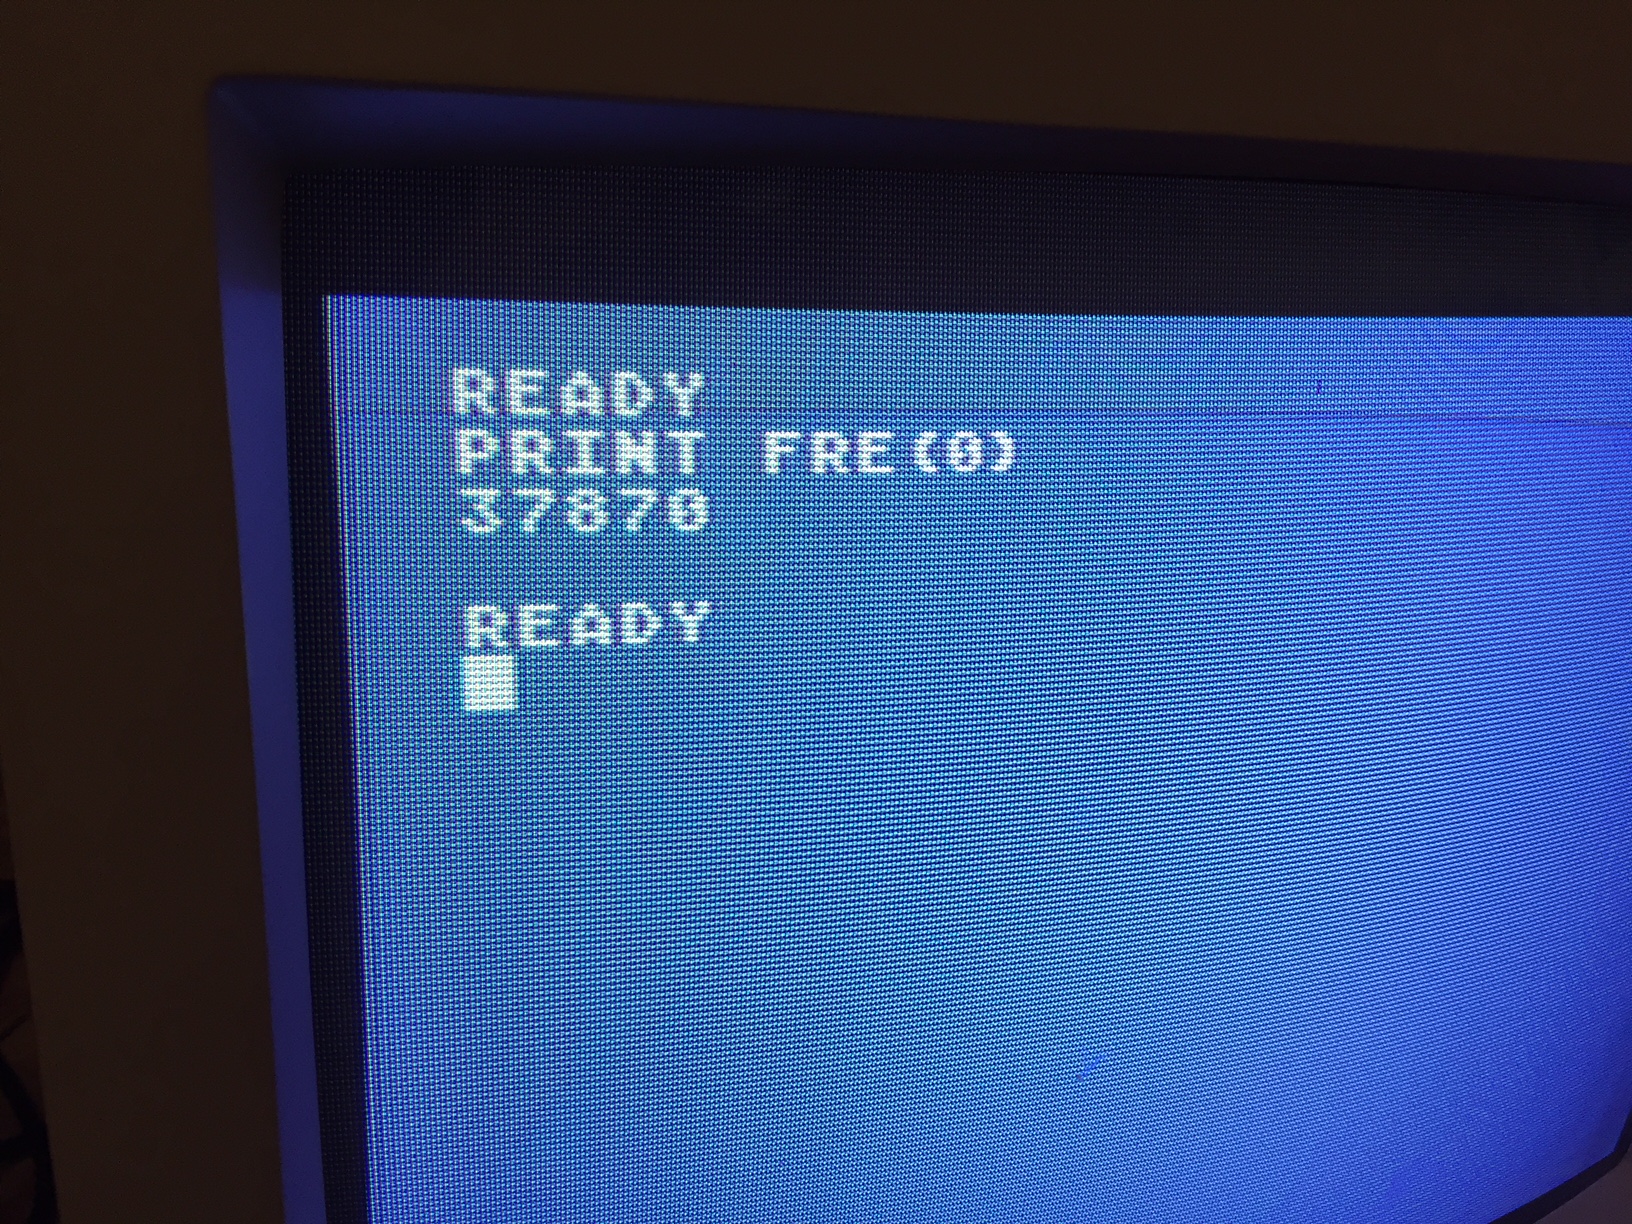
Nothing left now but cleaning, reassembly and final testing. I’m happy to say this unit is now fully restored and functional. Not exactly mint condition, but quite nice considering the age and everything it has been through. We will be happy to add it to our permanent collection!
I hope that you enjoyed this restoration project, feel free to contact us if you have any questions and please come back soon for more. Thanks!


